
Deploying Python App on Kubernetes: A Step-by-Step Guide
Shivam Rana
1/16/20256 min read
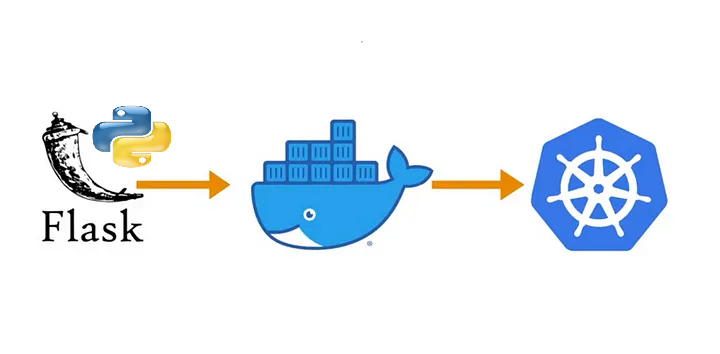
In this hands-on blog post, we’ll walk you through the process of deploying a simple Python application to a Kubernetes cluster. By the end of this tutorial, you'll have a "Hello, World!" Python app running in a containerized environment, deployed on Kubernetes, and accessible via a browser.
You can find the code for this project on my GitHub here. I also made a hands-on tutorial on YouTube, which you can watch here.
Let’s dive into the following steps:
Step 1: Creating a Hello World Application in Python
First, let’s write a simple Python application that will print "Hello, World!" to the browser. This is the heart of the application that we’ll eventually deploy to Kubernetes.
Here’s the Python code for main.py:
Explanation:
The code defines a basic Flask application with a single route (/), which responds to HTTP GET requests with the message "Hello from Python!".
The View class handles the logic for the GET request, and Flask's routing system is used to associate the URL / with this view.
The server runs on port 30001, with debug mode enabled, which helps during development.
When you run this script and navigate to http://localhost:30001/, you'll see the text Hello from Python! in your browser.
Step 2: Writing requirements.txt
Here's the code:
Flask
This installs the Python dependencies specified in the requirements.txt file. This allows you to install any libraries that your Python application needs to run.
Explanation:
FROM python:3.8 : We start with a Python image
EXPOSE 30001: Exposes port 30001so the app can be accessed externally.
WORKDIR /code: This sets the working directory inside the container.
COPY requirements.txt requirements.txt : This copies the requirements.txt file from the host machine (the machine where you're building the Docker image) into the container at the path /code/requirements.txt.
RUN pip install -r requirements.txt : This installs the Python dependencies specified in the requirements.txt file using pip. This allows you to install any libraries that your Python application needs to run.
COPY main.py . : This copies the main.py file from the host machine into the container’s working directory (/code).
CMD ["python", "./main.py"] : This sets the default command that will be run when the container is started. In this case, it will run python main.py, which means it will start the Python application by executing main.py.
Step 3: Writing a Dockerfile
Now, we need to containerize our Python application using Docker. A Dockerfile defines the steps required to build a Docker image for our app.
Here’s a basic Dockerfile for the app:
Step 4: Building a Docker Image
With the Dockerfile ready, we can now build the Docker image. To do this, follow these steps:
First, make sure you have Docker installed on your machine.
Navigate to the project directory (where Dockerfile and main.py are located).
Run the following command to build the Docker image:
docker build -t hellopy:0.1 .
The -t flag assigns a tag (name) to the image. Here, we’ve tagged it as hellopy:0.1
The . at the end tells Docker to use the current directory as the build context.
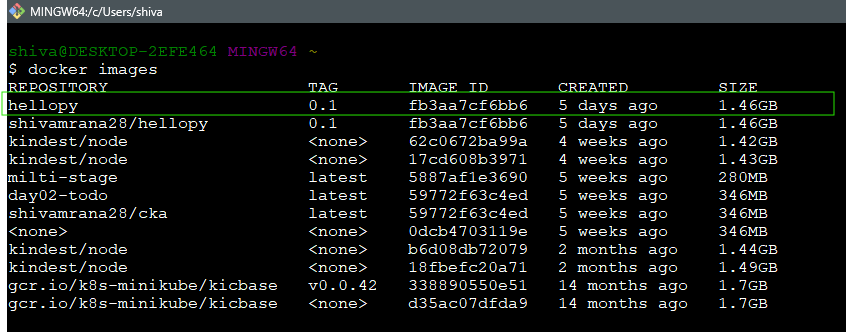
Once the image is built, you can verify it by running
docker images
You should see hellopy:0.1 listed.
Step 5: Deploying the Docker Image to Kubernetes
Next, we’ll deploy the Docker image to a Kubernetes cluster. For this tutorial, we’ll use a simple NodePort service to make the app accessible externally.
Prerequisites:
A running Kubernetes cluster (You can set up a local cluster using Kind Cluster).
kubectl configured to communicate with your cluster.
Steps:
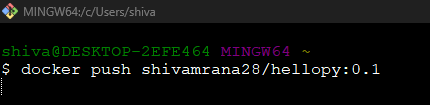
Push the Docker image to a registry: Before deploying the image to Kubernetes, you need to push the Docker image to a container registry (like Docker Hub, Google Container Registry, or others). For Docker Hub, you can do the following:
docker tag hellopy0.1 yourusername/hellopy :0.1
docker push yourusername/hellopy :0.1


Create a Kubernetes Pod: Create the pod using below command
kubectl run hellopy --image=shivamrana28/hellopy:0.1 --dry-run=client -o yaml > pod.yaml
here,
name of pod = hellopy
image = shivamrana28/hellopy:0.1
Contents pod.yaml
apiVersion: v1
kind: Pod
metadata:
creationTimestamp: null
labels:
run: hellopy
name: hellopy
spec:
containers:
- image: shivamrana28/hellopy:0.1
name: hellopy
ports:
- containerPort: 30001
resources: {}
dnsPolicy: ClusterFirst
restartPolicy: Always
status: {}
***Make sure to edit the pod.yaml file and add ports section to it as specified above.
Create a Kubernetes Service: To expose the application to the outside world, we’ll create a NodePort service.
Create a file named service.yaml:
apiVersion: v1
kind: Service
metadata:
name: hellosvc
spec:
type: NodePort
selector:
run : hellopy
ports:
- port: 30001
targetPort: 30001
Explanation:
nodePort: Specifies the external port that will allow you to access the app from the browser (in this case, port 30001).
Deploy to Kubernetes: Use the following kubectl commands to apply the deployment and service:
kubectl apply -f pod.yaml
kubectl apply -f hellosvc.yaml
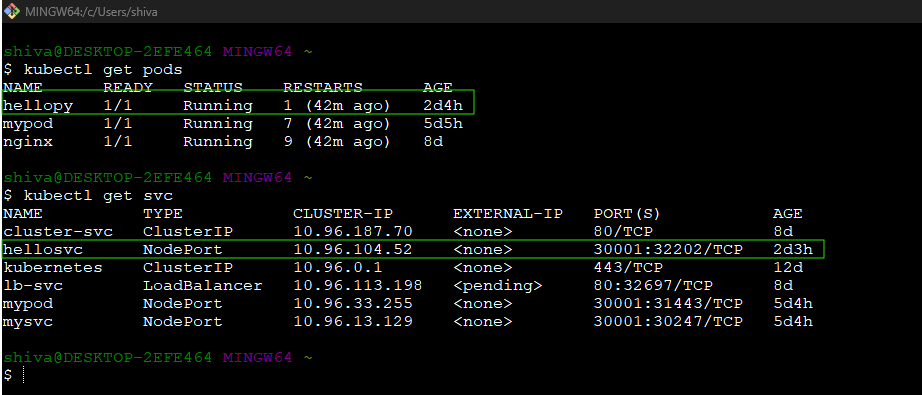
Verify the deployment: You can verify that everything is running correctly by using:
kubectl get pods
kubectl get svc
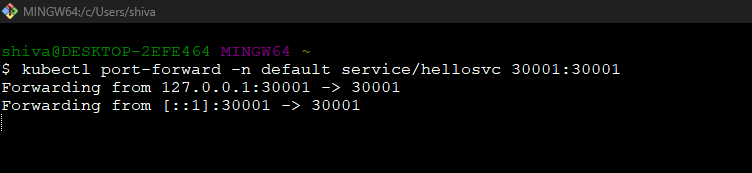
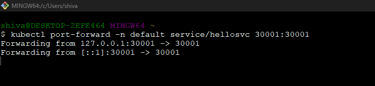
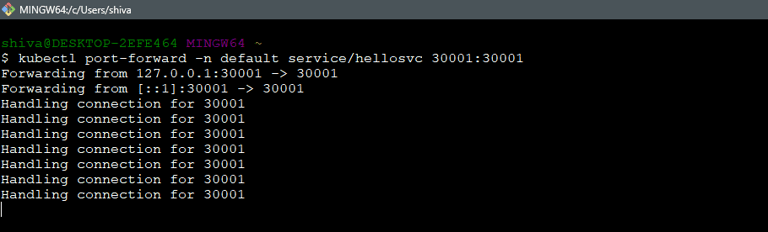
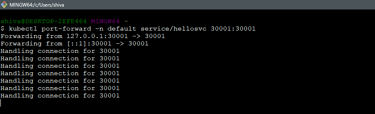
Step 6: Exposing port 30001
Use below command to expose your application on port 30001
kubectl port-forward -n default service/hellosvc 30001:30001
Greetings to all you incredible readers! 🌟 A heartfelt, joyful Hello and a deep, respectful Namaste to each and every one of you! 🙏✨
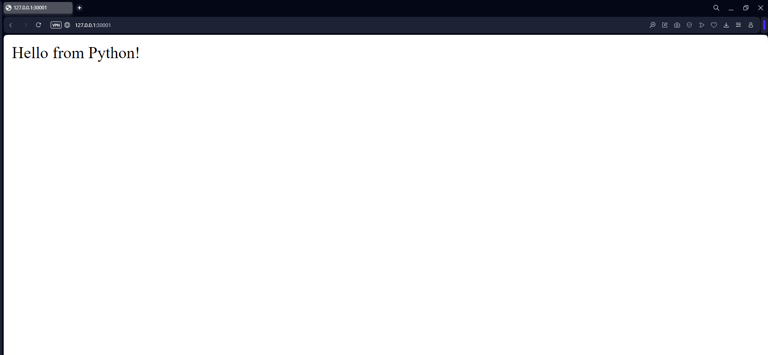
Step 7: Accessing the App in a Browser
Now that your application is deployed to Kubernetes, let’s access it from a browser.
Steps:
Copy the Ip address shown. In my case it is 127.0.0.1:30001 and paste it on browser.
Open your browser and navigate to the external IP address on port 30001.
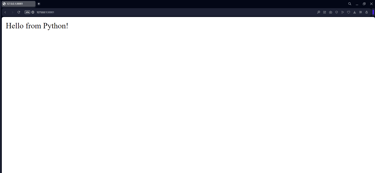
You should now see the "Hello from Python!" message displayed in your browser!
Conclusion
Congratulations! You’ve successfully deployed a "Hello, World!" Python application onto Kubernetes and accessed it via a browser. Here’s a summary of the steps:
We created a simple Python app using Flask.
We containerized the app with Docker.
We deployed the Docker image to a Kubernetes cluster.
Finally, we exposed the app via a NodePort service and accessed it in a browser.
This tutorial covered the basics of deploying a Python app to Kubernetes, and you can now explore more complex use cases, such as scaling the app, managing multiple services, and integrating with databases.
For those of you who want to dive deeper into the code, you can explore my GitHub repository here. Additionally, I've created a hands-on tutorial on YouTube that walks you through the entire process—check it out here. Happy coding, and feel free to leave any questions or feedback!
Thank you so much for taking the time to follow along with this tutorial! 🙏😊 I truly hope you found the process insightful and that it helped demystify the steps involved in deploying Python applications to Kubernetes. 🐍🚀 By now, you should feel more confident and ready to deploy your own apps like a pro! 💪💻 I hope this experience has boosted your confidence 💡 and inspired you to dive even deeper into the exciting world of containerization and cloud-native development! 🌐🔧
Happy coding, and keep experimenting! 🎉🎨